4 Apr 2025
Post by Elowenly
Introduction
Transferring your SIM card from an Android device to a new iPhone might appear challenging, but with the right steps, it’s straightforward. Owning a new iPhone brings excitement, and ensuring your SIM card works correctly is a crucial part of the process. This guide will lead you through each stage, ensuring a smooth transition and addressing any potential issues.

Preparing for the Transfer
Before you physically transfer your SIM card, there are preparatory steps to ensure a smooth process.
- Back up Your Data: Use services like Google Drive on your Android to securely back up contacts, messages, and critical data.
- Confirm Compatibility: Check if the SIM card from your Android is compatible with the new iPhone. iPhones generally use Nano SIM cards, so verify that your current SIM size matches.
- Carrier Lock Status: Ensure that both your Android device and new iPhone are unlocked or compatible with your carrier.
- Network Settings: Note any special network settings from your Android device. You might need them for setting up your iPhone.
These preparatory actions will minimize potential issues and ensure your important information is retained during the transfer process.
Removing the SIM Card from Android
The next step is to remove the SIM card from your Android device:
- Turn Off Your Device: This protects your SIM card and the phone’s internal settings from damage.
- Locate the SIM Tray: The SIM card tray is usually on the side or the back of most Android devices. Use the SIM card ejection tool that came with your phone or a small paper clip.
- Eject the SIM Tray: Insert the tool into the small hole next to the SIM tray and press gently until the tray pops out.
- Remove the SIM Card: Carefully take the SIM card out of the tray without bending it.
Place the SIM card somewhere safe until you’re ready to insert it into your new iPhone.

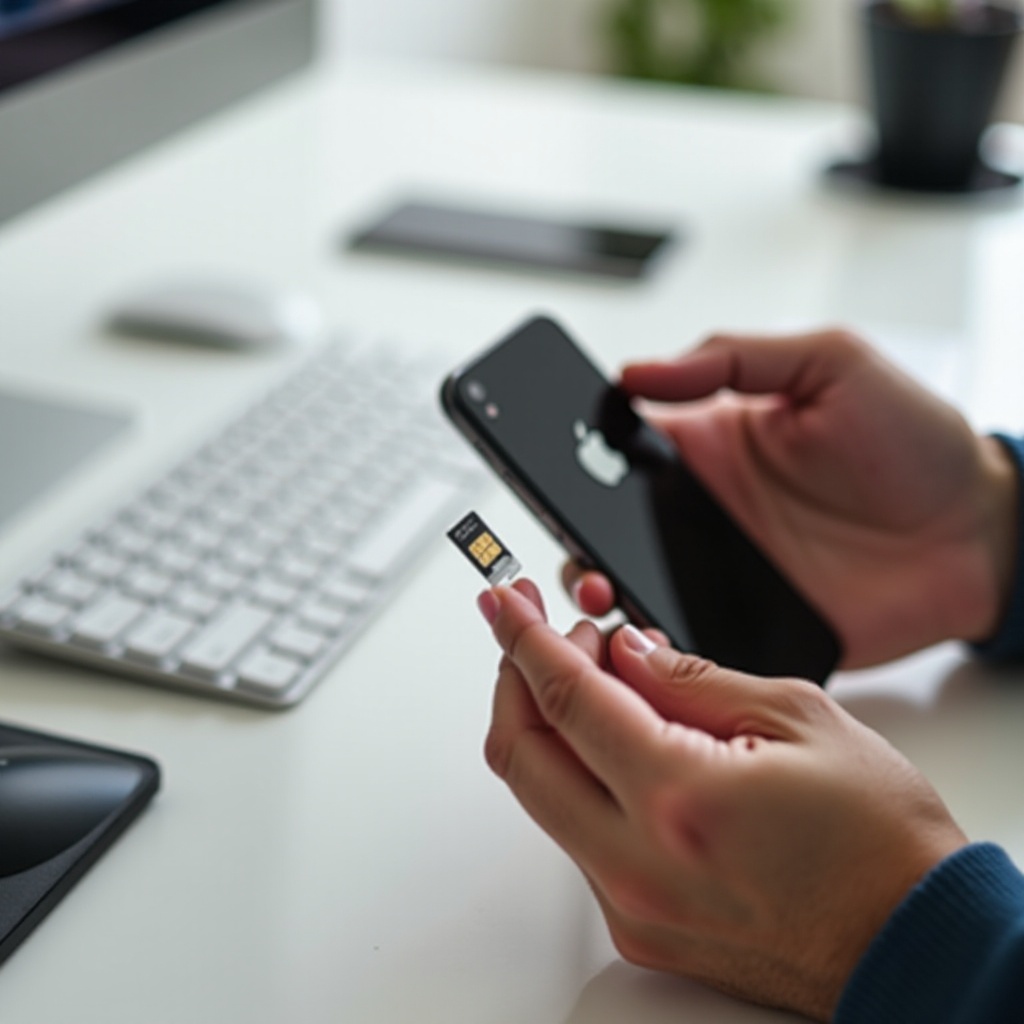
Inserting the SIM Card into Your New iPhone
Now that you’ve successfully removed the SIM card from your Android device, it’s time to insert it into your iPhone.
- Turn Off Your iPhone: Although not always necessary, turning off your device ensures the network settings are properly configured.
- Locate the SIM Tray: The SIM card slot on an iPhone is typically found on the side.
- Eject the SIM Tray: Use the SIM card ejection tool to press into the small hole beside the tray, and it will pop out.
- Insert the SIM Card: Place your SIM card in the tray with the gold contacts facing down and the cut corner aligned properly. Gently push the tray back into place.
With the SIM card inserted, you’re ready to set up your new iPhone.
Setting Up Your New iPhone
Once your SIM card is inserted, power up your iPhone and follow these steps:
- Activation: Your iPhone will prompt you to begin the setup process. Follow the on-screen instructions to activate your device.
- Wi-Fi Connection: Connect to a Wi-Fi network to proceed with the setup, vital for synchronizing your data.
- Restore Backup: If you previously backed up your data to iCloud or iTunes, you will have the option to restore your data during the setup process.
- Transfer Data: Use the ‘Move to iOS’ app to transfer your data directly from your Android device. This app can transfer contacts, message history, and photos.
- Set Up Apple Services: Complete the setup by enabling services like iCloud, Siri, and Apple Pay if desired.
Following these steps ensures your new iPhone is set up correctly and your important data is successfully transferred.
Troubleshooting Common Issues
Despite the best preparation, issues can arise during the transfer process. Here are some common problems and their solutions:
- SIM Card Not Recognized:
- Reinsert the SIM card, ensuring it’s properly placed.
- Restart your iPhone.
- If the problem persists, contact your carrier to ensure your SIM card is activated and compatible with the new device.
- No Service or Signal Issues:
- Check your network settings.
- Ensure you’re in an area with good signal coverage.
- Reset network settings: Go to Settings > General > Reset > Reset Network Settings.
- Data Transfer Problems:
- Ensure a proper Wi-Fi connection.
- Restart both devices and try again.
- If using the ‘Move to iOS’ app, make sure both devices are updated to the latest software versions.
These steps should resolve most issues and help you complete the transfer successfully.
Conclusion
Transferring your SIM card from an Android device to a new iPhone doesn’t need to be complicated. By following this guide, you can ensure a seamless transition and start enjoying your new iPhone hassle-free. Don’t forget to back up your data, confirm compatibility, and follow the setup instructions carefully. If any issues arise, the troubleshooting section provides solutions to resolve them quickly.
Frequently Asked Questions
What should I do if my SIM card doesn’t fit in my new iPhone?
If your SIM card doesn’t fit, it’s likely that the SIM card size differs. Visit your carrier to get a SIM card that fits your iPhone, or purchase a SIM card cutter to resize your existing card.
Will I lose my contacts and other data during the SIM card transfer?
No, you shouldn’t lose any data if you back up your Android device properly before transferring. Use the ‘Move to iOS’ app for a more seamless transfer of your contacts and other important data.
Why is my new iPhone not detecting the SIM card?
If your iPhone isn’t detecting the SIM card, ensure the SIM card is inserted correctly and the iPhone is not carrier-locked to another provider. Restart the device or reset network settings to resolve this issue. If the problem persists, contact your carrier for further assistance.